Microsoft Word is a graphical word processing program used to create text-based documents. It’s included in all of the Microsoft Office application suites and is one of the most widely-used word processors.
The importance of indenting
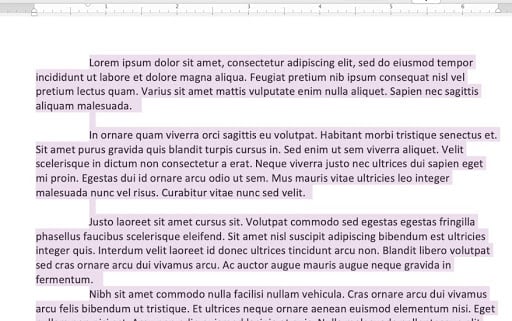
When creating a body of text in a Word document, indenting the first line adds structure and is the most common way to signal the start of a new paragraph or topic.
Block paragraphs are the default in Word, meaning that each line within a paragraph is aligned with the left margin, and the paragraphs only visually separated by line spaces. As a general rule, block paragraphs are more common when writing for an online platform, and indented paragraphs are more common in print publishing and academic research.
The images featured in this article are from Microsoft 365 (formerly Office 365), which is the same as Word 2019. The steps are the same for Word 2016, Word 2013, and Word 2010.

Aside from indenting the first line, it’s also possible to indent every line except for the first line, known as a hanging indent or second line indent. Hanging indents are typically used in bibliography or reference sections.

6 ways to indent in Microsoft Word
There are multiple ways to indent in Microsoft Word depending on the style of document you’re creating and your preferences. But first, ensure the Ruler feature is displayed. This allows you to better position and customize your text spacing. To display the Ruler:
- Click the View tab
- Click the checkbox next to Ruler in the left hand corner

-
Indent using the tab key
The quickest way to indent is to use the Tab key. This will create a first-line indent of ½ inch.
1. Place your cursor at the very beginning of the paragraph you want to indent.
2. Press the Tab key. On the Ruler at the top of the screen, the first-line indent marker (the marker pointing down toward the text) will move to the right by ½ inch.
3. Continue placing the cursor at the beginning of paragraphs and repeat. If there is nothing yet written on the document, press Tab before beginning a new paragraph. -
Indent using Microsoft’s indent markers
If you want a customized indent (an indention more or less than ½ inch), Word provides indent markers that allows users to indent paragraphs to the measurement of their choosing. The markers look like this on the Ruler at the top of the screen:

There are several indenting options with these markers:
– First line indent marker adjusts the first-line indent
– Hanging indent makeradjusts the second line indent
– Left indent marker moves both the first-line indent and hanging indent markers at
the same time (moving the margins of the text).
1. Place the cursor anywhere in the paragraph you want to indent, or select one or more paragraphs.
2. Click and drag the indent marker, whether the first, hanging, or left indent marker, and drag it to the desired location. For this example, we’ve dragged the first-line indent marker to ¾ inch.
-
Indent using indent commands
Microsoft Word features indent command buttons, moving every line in a paragraph left or right in ½ inch increments.
1. Place your cursor on the text you want to indent. If multiple paragraphs need indenting, highlight them all.
2. On the Home tab, click the Increase Indent or Decrease Indent button
3. The entire paragraph will indent ½ inch. To return to the original margins or decrease the indent by ½ inch, click Decrease Indent.
*To customize the spacing of the indent for the buttons, click the Layout tab and enter your desired values in the boxes under Indent in the middle of the ribbon.
-
Indent using tab stops
A tab stop describes the location the cursor stops at after the Tab key is pressed. The left side of the screen shows the Tab Selector.

When clicked, it will cycle through all the possible options of tab stops that determine whether the text is left aligned, centered, etc. Types of tab stops include:
– Left Tab left-aligns the text at the tab stop
– Center Tab centers the text around the tab stop
– Right Tab right-aligns the text at the tab stop
– Decimal Tab aligns decimal numbers using the decimal point
– Bar Tab draws a vertical line on the document
1. To add a tab stop, select the paragraph(s) you want to add tab stops to.
2. Click the Tab Selector until the tab stop you want to use appears. For this example, we’ve selected the Right Tab.
3. Click the location on the horizontal ruler at the top where you want your text to appear. More than one tab stop can be added.
4. Place your cursor in front of the text you want to tab, the press Tab. The text will jump to the closest tab stop you’ve created.
-
Set the indent by default
To set the a first-line indentation as a default, modify the normal style:
1. Move your cursor to anywhere in the paragraph.
2. On the Home tab, right click the Normal style box and select Modify.
3. In the drop-down menu in the bottom left of the pop-up window, click on Format, then choose Paragraph.
4. On the Indents and Spacing tab, under Indentation, select First line under the Special drop-down menu.
5. Type in the amount of spacing you want the indent to be next to the By box, and click OK, and then click OK again. 4. -
Create a hanging indent
1. Select the paragraph where you want to add a hanging indent.
2. Go to Format and then Paragraph. This can also be done by right clicking on the Normal style box as mentioned above.
3. On the Indents and Spacing tab, under Indentation, select Hanging under the Special drop-down menu and enter in your spacing requirements
4. Select OK. The outcome should look like this: