
A Facebook page is a public profile specifically created for businesses, public figures, brands, causes, or other organizations. A page is different from a Facebook profile, which is a personal account assigned to a user when they sign up for Facebook. A profile is where users connect with family, friends, and colleagues and share personal information with others.
A Facebook page is separate from a personal profile. A page does not gain “friends,” but instead gains “fans,” which are people who “like” the page. Pages can have an unlimited number of fans, and they work similarly to profiles in terms of usability. A Facebook page updates users with things such as statuses, links, events, photos, and videos about the topic of the page. When a user likes a page on Facebook, they can see updates from that page in their news feed.

Creating a Facebook page is free, and it’s a valuable tool in marketing a business, cause, or brand. With over 2.7 billion monthly users, it serves as a platform to promote services, increase customer support, and boost recognition.
It allows the creator to interact with customers and provide information such as products and services, hours, location, and reviews. It helps establish brand identity and can increase traffic to both the page itself and the creator’s website.
How to create a Facebook Page in 7 Steps
- Create a Facebook profile
- Choose a page category
- Fill out page information
- Add additional page information
- Create a username
- Add business details
- Create the first post
-
Create a Facebook profile
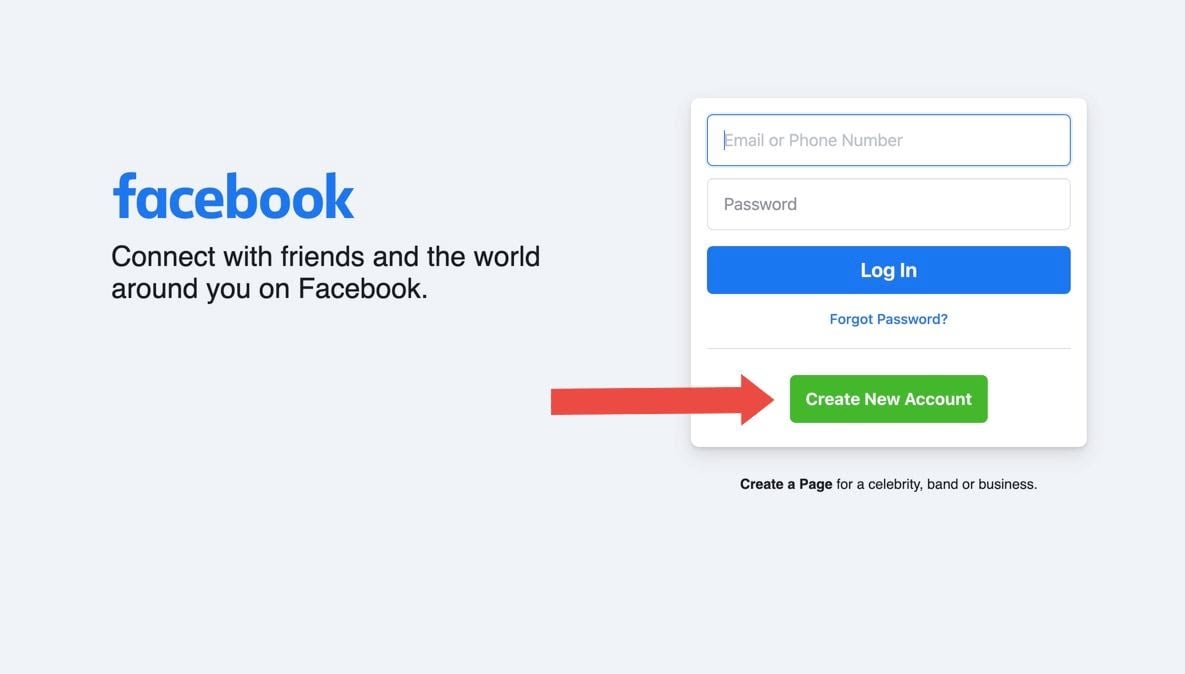
To create a Facebook page, a user must first have a Facebook profile. To do that, navigate to facebook.com and click Create New Account. Enter your first and last name, mobile number or email address, birthday, and gender. Then, create a password.

-
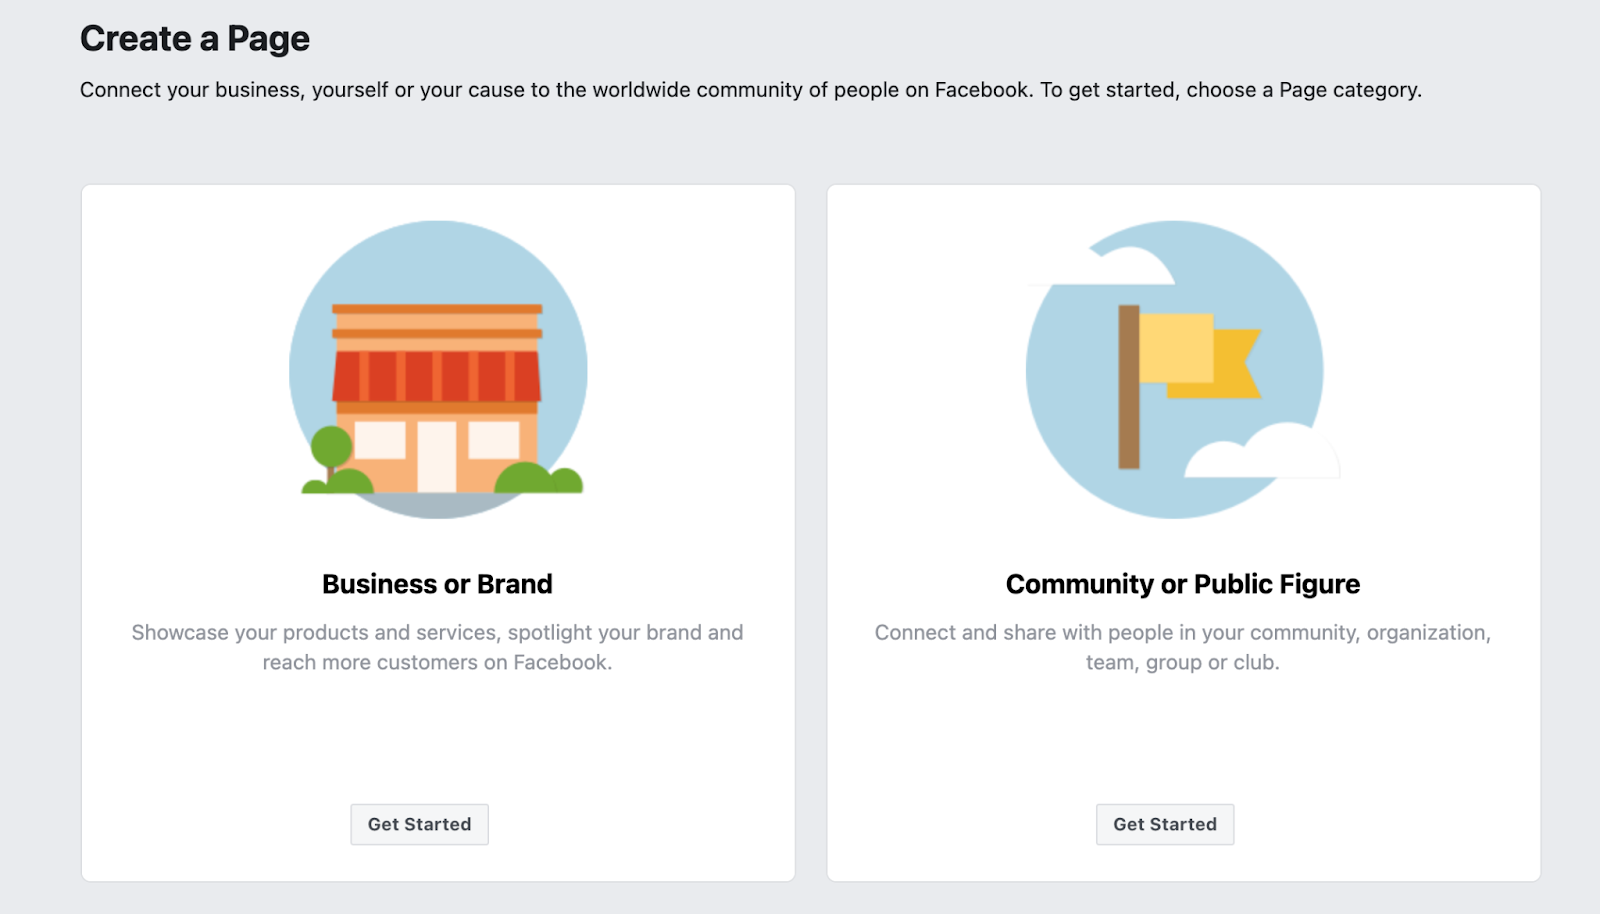
Choose a page category
Once you have an account, navigate to facebook.com/pages/create/. Choose whether you’d like to create a Business or Brand page or a Community or Public Figure page.

Depending on your page’s category, different features are available. The table below from the Facebook Help Center outlines the different page categories and the features that are available to each.
For the purpose of this how-to article, we are going to choose the Business or Brand category, as the only difference is the addition of address, map, and check-in information. -
Fill out page information
After you’ve chosen your page category, Facebook will prompt you to enter relevant information about your business.
Page name
Use the name of your business, the name people are likely to search when trying to find your business, or a name that describes what the page is about.
Category
Type in up to three categories your business falls into or topics your page represents. This allows your page visitors to know more about the specific service(s) you provide. Once you start typing, Facebook will suggest some options. Choose the closest option.
We recommend being specific when choosing categories. For example, instead of choosing “Restaurant,” choose “Greek Restaurant.” You can edit these categories later (outlined in step 6).
Description
After choosing categories, give a brief description about what your business does, the services you provide, or the purpose of the page in 255 characters or less. After filling out the description, click Create Page. -
Add additional page information
Once you click Create Page, additional boxes will appear to add a profile and cover photo.
Profile photo
The profile photo will accompany your business name in search results and appear on the top left of your Facebook page. Using your company’s logo (if for a business page) or a headshot (if for a public figure) will best help potential customers or followers recognize your page.
Facebook profile pictures display at 170 x 170 pixels on desktop and 128 x 128 pixels on mobile. It will be cropped to a circle, so make sure nothing critical is around the edges of your chosen photo.
To upload your profile photo, click Add Profile Picture and choose a file from your computer. You can also drag and drop a file.
Cover photo
The cover photo is the largest image on the page and is likely the first thing the viewer will notice. Your cover photo should capture the essence of your brand and personality.
Facebook cover photos display at 820 x 312 pixels on desktop and 640 x 360 pixels on mobile.
To upload your cover photo, click Add Cover Photo and choose a file from your computer. You can also drag and drop a file.
After you’ve chosen your photos, click Save at the bottom. -
Create a username
After clicking Save, your page has gone live. At this point, the essentials of the page are complete, but there is additional information that can be added to enhance your page.
Create a username by clicking on the blue Create @Username button beside your profile photo. This username, also known as a vanity URL, is how you tell people where to find you on Facebook.
The username can be up to 50 characters long, but try to keep it as concise as possible for your customers to easily remember it. We recommend using your business or public figure’s name. If your chosen username is already taken, add a number or other differentiating factor.
Once you’ve entered a username, click Create Username, then click Done.
-
Add business details
To add important business details that customers are looking for, such as when business hours are or the areas your business services, click Edit Page Info from the menu on the left-hand side of the screen.
– Phone number
Here you can edit your description, add or remove categories, and fill in additional, optional information if it applies:
– WhatsApp phone number
– Associated email address
– Associated website
– Location
There are also options to select if your business is not a physical location, if your business travels to the customer, or if your business sells goods or services to customers online.
– Service area
– Hours
– Temporary service changes
– Privacy policy
– Impressum (a legal statement of ownership required in some European countries)
– Products offered
– Price range
– Other social media accounts, such as Instagram, Twitter, YouTube, etc.
Changes are automatically saved. -
Create the first post
As the final step, create valuable content for new visitors to your page by clicking Create Post.

Write a post that offers value to your visitors, such as insight from thought leaders in your industry or why your business stands above the rest and click Post when completed.


Top frequently asked Facebook page questions
How do I manage roles for my Facebook page?
Once you’ve created a Facebook page, you can add an unlimited number of people to your page with varying levels of permission. There are five roles for users who manage pages:

The creator of the page is an Admin. To give, take away, or change someone’s role:
- From your News Feed, click Pages on the left-hand side of the screen
- Click on your page and click Settings
- Click Page Roles
- Type a name or email in the box under Assign a New Page Role and select the person from the list Facebook populates.
- Click on the Editor button to the right of the box to toggle between roles and select the appropriate one.
- Click Add and enter your account password to confirm.
How do I find my Facebook Page ID?
A Facebook ID is a string of numbers that does not personally identify you but does identify your Facebook Page. To find your Page ID:
- From your News Feed, click Pages on the left-hand side of the screen
- Click on your page
- Click About at the top of your page. If you don’t see it, click More

4. Scroll down to find your Page ID below MORE INFO

How do I ban someone from my Facebook page?
Facebook recommends banning users who continually publish spam on your page. When you ban a user, they’ll still be able to share content from your Page, but they’ll no longer be able to publish to your page, like or comment on the posts, or message the page. To ban someone:
- From your News Feed, click Pages on the left-hand side of the screen
- Click on your page
- Click Settings
- Click People and Other Pages in the left column.
- Search for the person or click to check the box next to the name of the person you want to ban.
- Click the cog icon and select Ban From Page.
- Click Confirm.
How do I recover a Facebook page?
It’s not uncommon to lose access to a Facebook page. A common reason is a former staff member set up the account and has since left the business, taking the access with them. It could also be from forgetting a username or password, or having a fake or secondary profile shut down by Facebook.
To recover a Facebook page, the best option is to recover the Facebook profile attached to it:
- Log out of Facebook on your computer (and make sure you know your password to log back in).
- Click on the Forgotten account link that appears under the space where you enter your details to log in.
- Try entering your past email addresses or a phone number that you attached to your Profile.
- If you find the correct account, click on the continue button and Facebook will send you an email with a code.
If your account has been disabled because Facebook thinks it’s fake, you will be required to provide information or make changes to verify your account, such as uploading your ID, identifying your friends, or verifying your phone number.
How do I unpublish a Facebook page?
Unpublished pages are only visible to the people who manage the page and will hide it from the public. If you’re an admin, you can unpublish your page by following these steps:
- From your News Feed, click Pages in the left menu.
- Go to your Page and click Page Settings in the bottom left.
- From General, click Page Visibility.
- Click to select Page unpublished.
- Click Save Changes.
- Share your reason for unpublishing this Page.
- Click Next then click Unpublish.